GPT Engineer: Building Applications with Generative Pre-Trained Transformers
Updated on
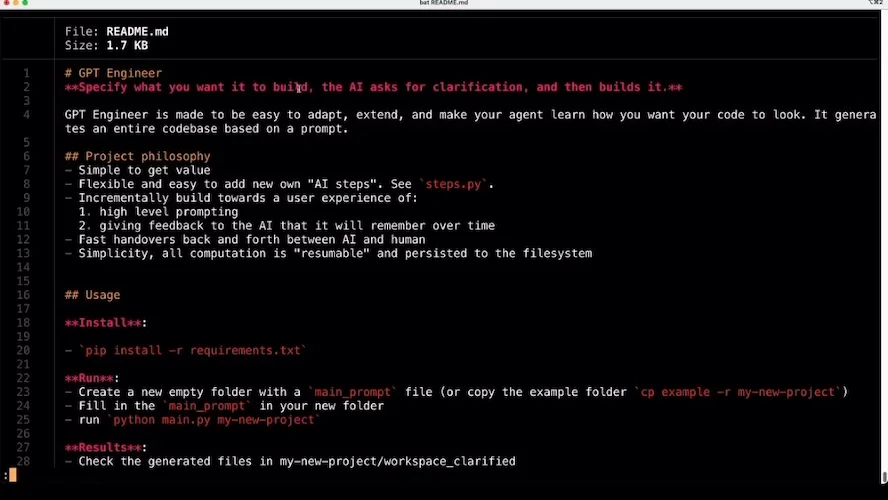
In the realm of artificial intelligence and code generation, GPT Engineer stands out as a powerful tool that is revolutionizing the way we build applications. As an open-source tool, GPT Engineer leverages the power of generative AI and neural network models to create robust applications based on simple text prompts. This article serves as your comprehensive guide to understanding, adapting, and extending GPT Engineer for your coding needs.
GPT Engineer is not just another AI tool; it's a game-changer. It's about harnessing the power of Generative Pre-trained Transformers (GPT) to create applications that can learn, adapt, and grow. Whether you're a seasoned developer or a beginner stepping into the world of AI-based code generation, GPT Engineer offers a unique approach to building applications that are both efficient and adaptable.
What is GPT Engineer? Why It's So Popular?
GPT Engineer is a tool that uses the power of GPT, or Generative Pre-trained Transformers, to generate code. But what does this mean? In essence, GPT is a type of neural network model that uses machine learning to generate human-like text. When we talk about GPT in the context of GPT Engineer, we're referring to the application of this technology to generate code based on text prompts.

Generative Pre-trained Transformers are a type of model architecture used in natural language processing. They are designed to generate text that is contextually relevant and grammatically correct. In the case of GPT Engineer, these models are trained to generate code, making it possible to build complete applications based on a set of instructions or prompts.
GPT Engineer takes this concept a step further by learning to generate code based on desired preferences. This means that you can guide the tool to generate code in a specific style or format, making it a highly adaptable tool for various coding projects.
How to Quickly Set Up GPT Engineer
Download and Install GPT Engineer
To get started with GPT Engineer, follow these step-by-step instructions to download, install, and set it up on your preferred operating system:
-
Download GPT Engineer
-
You can clone GPT Engineer to your local environment. Open a terminal or command prompt and run the following command to clone the GPT Engineer repository:
git clone https://github.com/AntonOsika/gpt-engineer.git -
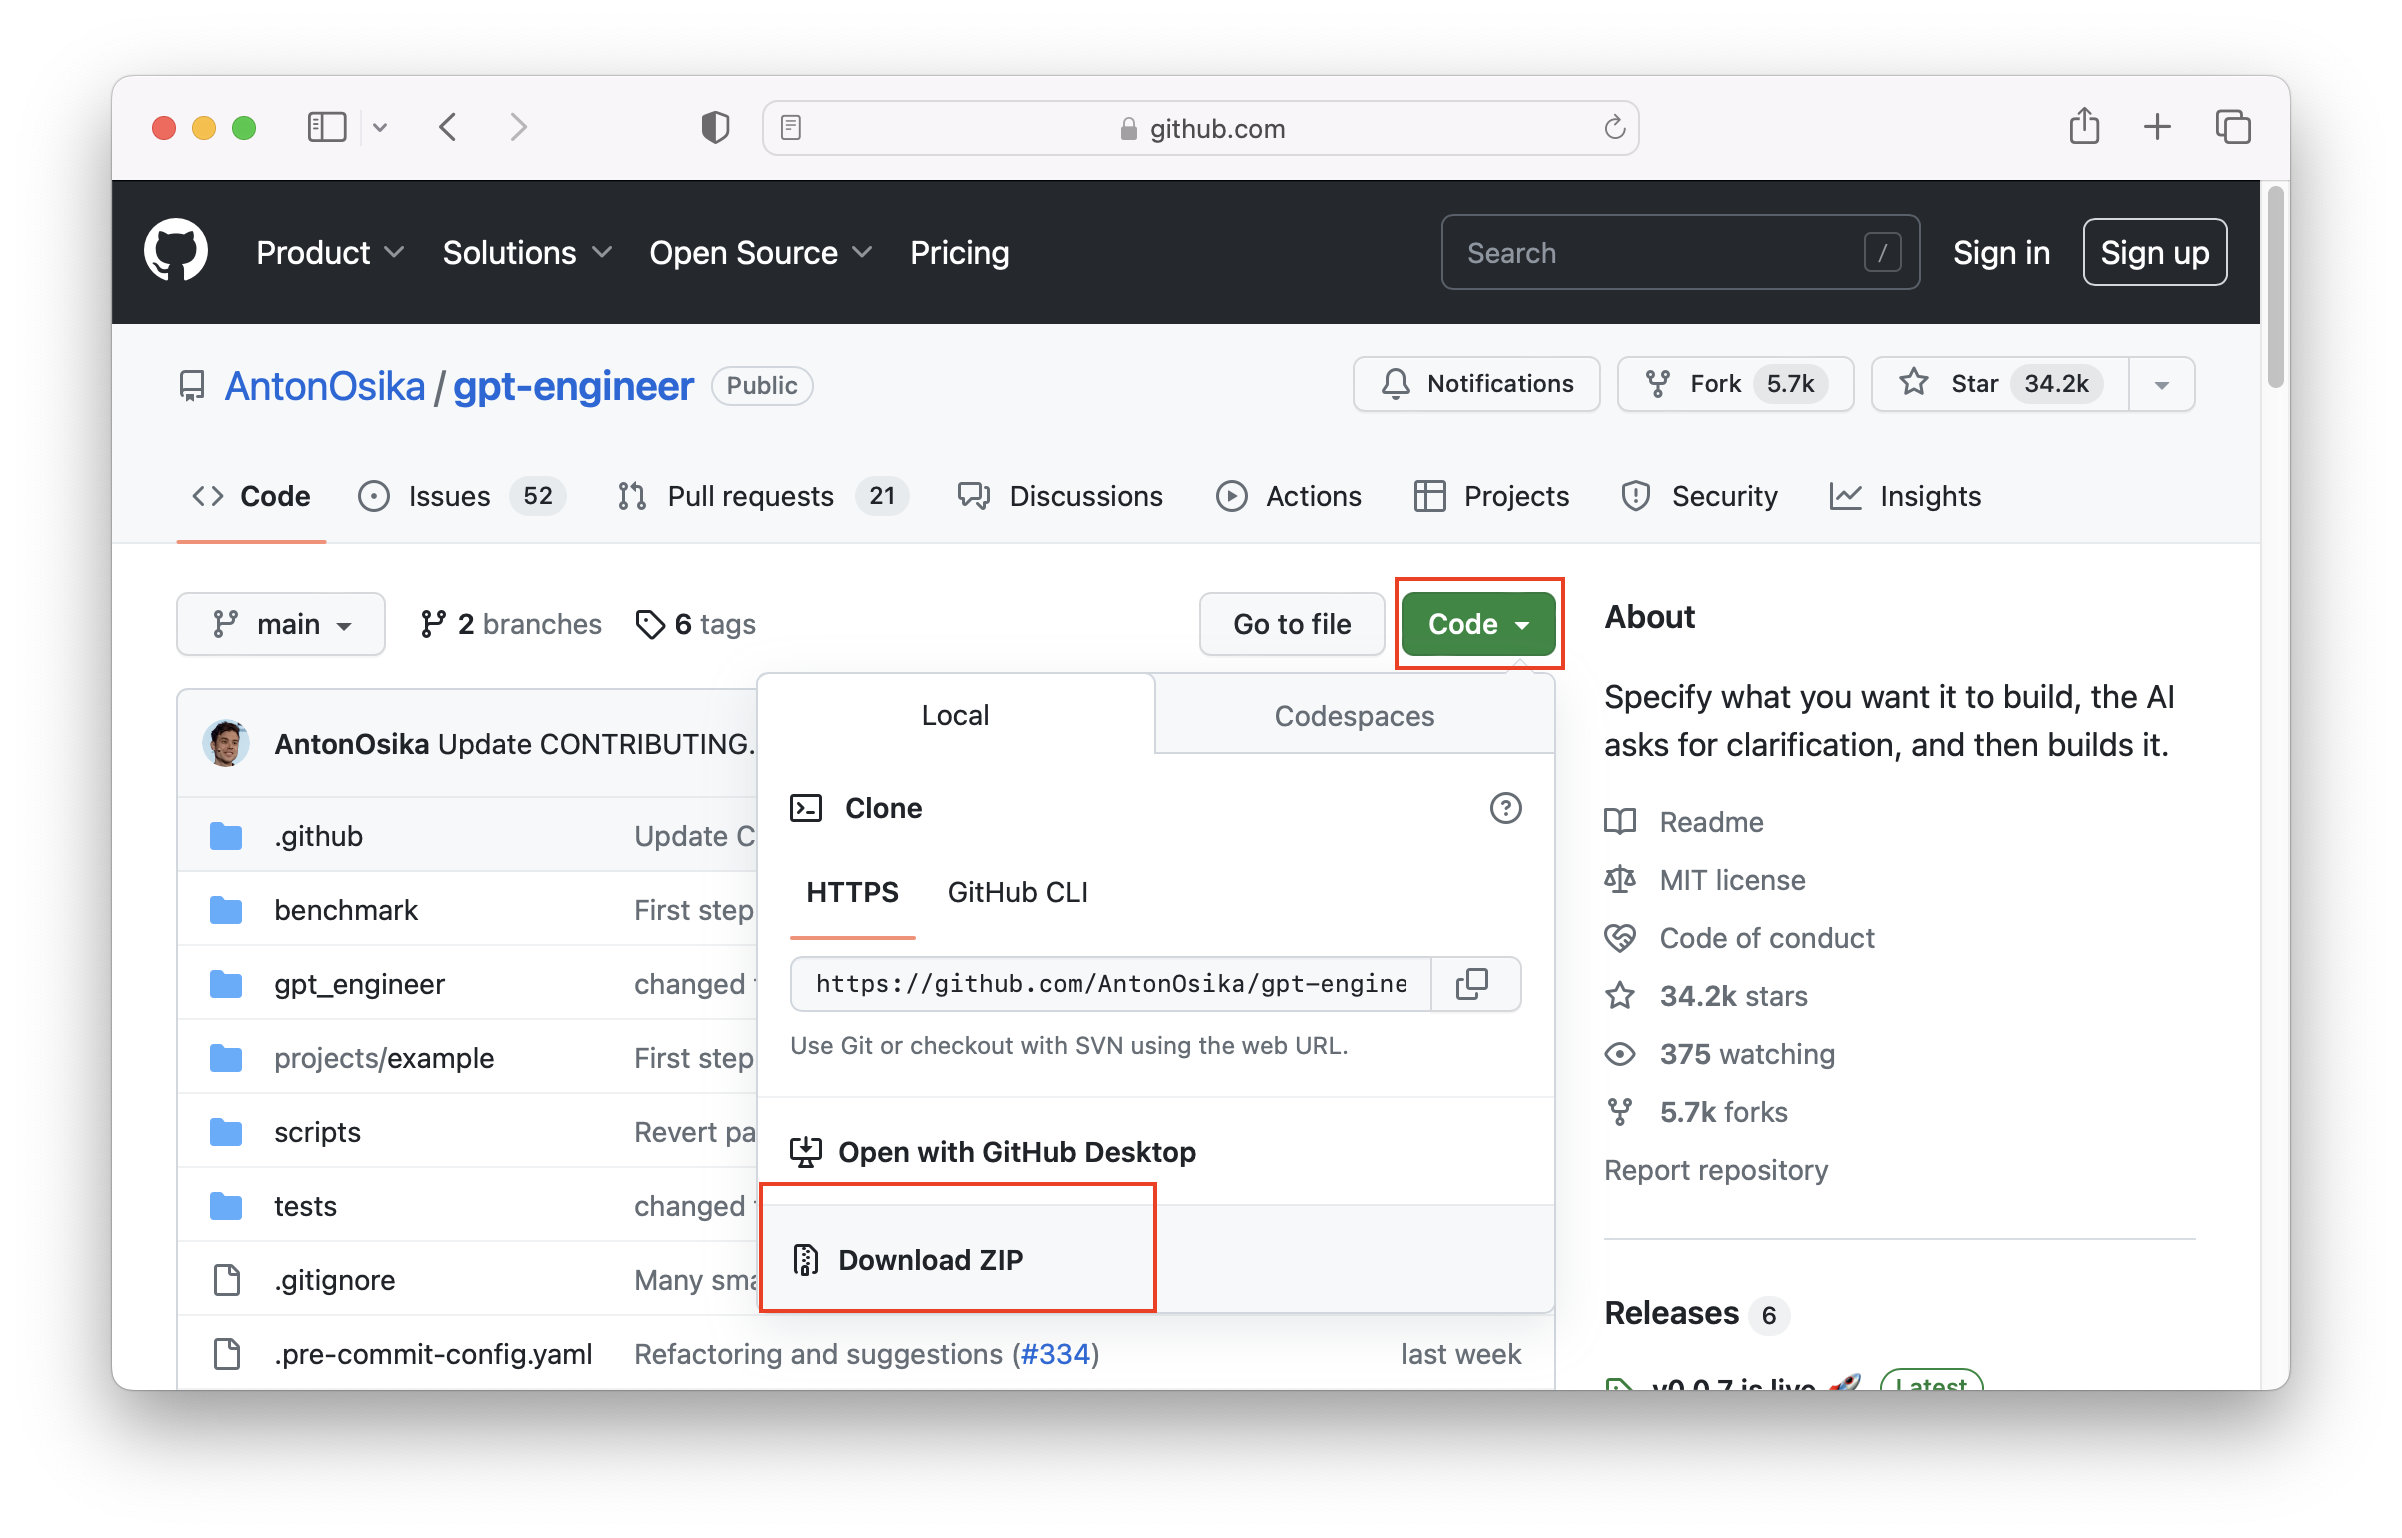
You can also directly Download GPT Engineer at the official GitHub page, by clicking on Code and selecting Download Zip.

-
-
Set Up Python Environment
- GPT Engineer requires Python to run. If you don't have Python installed, visit the official Python website (python.org (opens in a new tab)) and download the latest version compatible with your operating system. Follow the installation instructions provided by Python to install it on your computer. Run these commands:
cd gpt-engineer
pip install -e .
If you are using a virtual environment, consider this method:
make install && source venv/bin/activate -
Set Up GPT Engineer
-
Once the dependencies are installed, you need to set up GPT Engineer by running the following command:
python setup.py developThis command will install GPT Engineer as a development package on your system.
-
-
Verify the Installation
-
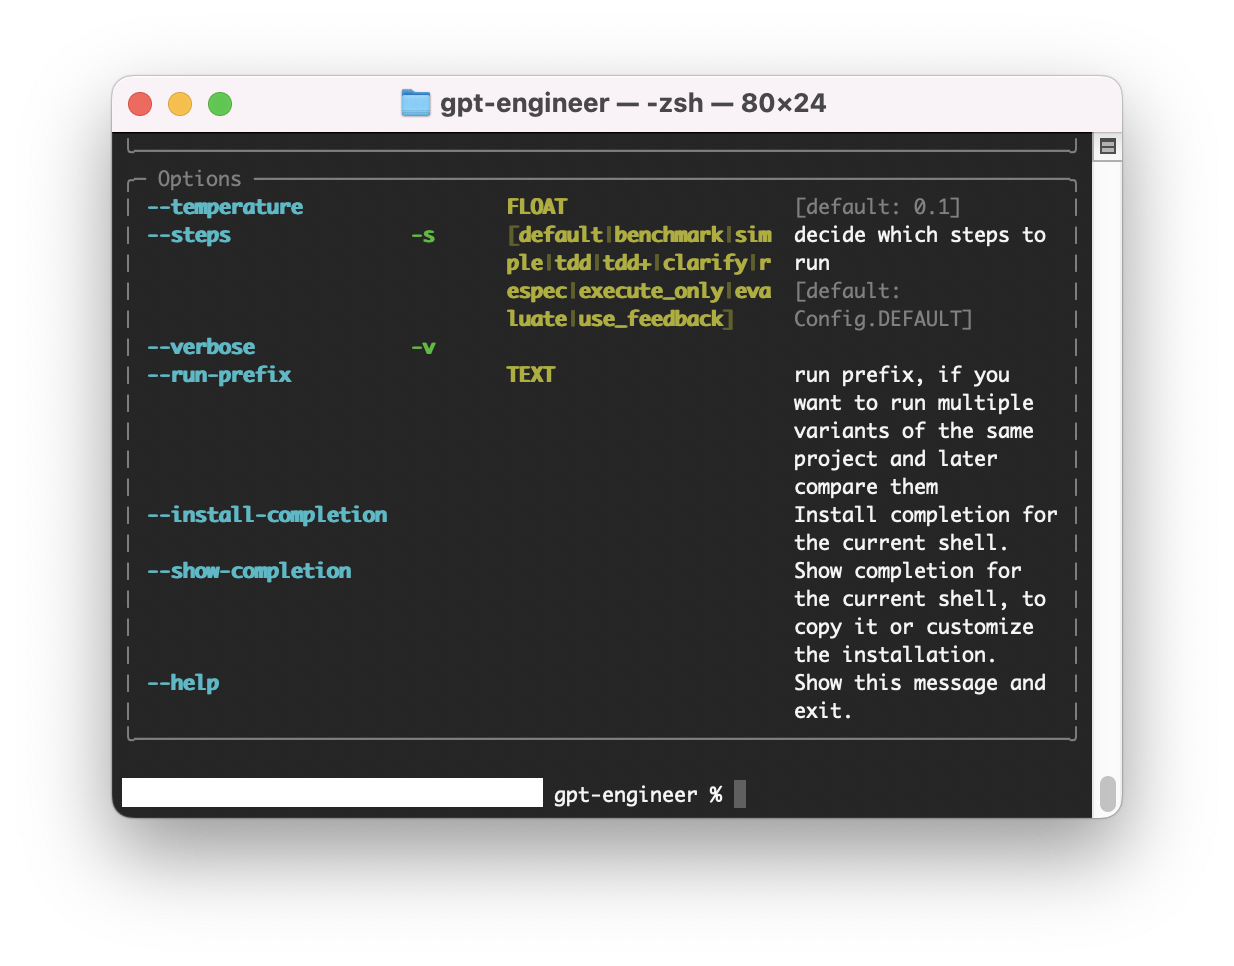
To verify that GPT Engineer is installed correctly, run the following command:
gpt-engineer --helpIf the installation is successful, you should see the help message with available commands and options.
-

Once you have completed these steps, GPT Engineer will be installed and ready to use on your system.
Run GPT Engineer Projects in VSCode
To run a GPT Engineer project in VSCode, follow these additional steps:
-
Open the Specific Directory in VS Code
- Open the GPT-Engineer directory in your preferred code editor, such as Visual Studio Code (VS Code).
-
Define the Project
- Inside the GPT-Engineer directory, locate the "example" directory and open the main prompt file. This is where you will describe the type of project you want GPT Engineer to generate. You can be as specific as you want, providing details and prompts for the code generation.
-
Get the OpenAI API Key
- Sign up for an OpenAI account and create an API key.
- In the terminal or command prompt, type the following command to set the API key as an environment variable:
export OPENAI_API_KEY=your_api_key
-
Run the Main File
- In the terminal or command prompt, navigate to the GPT-Engineer directory.
- Run the following command to execute the main file, specifying the folder containing the main prompt:
python main.py example - Note: Replace "example" with the name of the folder that contains your main prompt file.
After running the main file, GPT Engineer will prompt you for any areas of clarification or additional details you want to provide. You can provide as much information as needed. GPT Engineer will then start generating the code based on your prompts and specifications.
Building Applications with GPT Engineer
GPT Engineer operates on a simple yet powerful principle: code generation based on text prompts. This means that you can instruct the tool to generate a specific type of code by providing a text prompt. For example, if you want GPT Engineer to generate a Python function for a specific task, you can provide a prompt describing the function, and GPT Engineer will generate the corresponding code.
One of the most exciting features of GPT Engineer is its ability to build complete applications. This is made possible by its full codebase generation capability. With GPT Engineer, you can build a complete application by providing a series of prompts describing the application's functionality.
Building a Hello World JavaScript with GPT Engineer
GPT Engineer offers the capability to generate code in JavaScript, providing a convenient way to automate code generation tasks. By following these steps, you can easily leverage GPT Engineer in your JavaScript projects:
Step 1: Install the GPT Engineer Package
Begin by installing the GPT Engineer package in your JavaScript project. Use your preferred package manager, such as npm or yarn, to install the package. Run the following command in your project directory:
npm install gpt-engineerThis command will download and install the GPT Engineer package along with its dependencies.
Step 2: Create a New JavaScript Project and Import GPT Engineer
Set up a new JavaScript project in your desired directory. This could be a simple JavaScript file or a larger project using frameworks like Node.js, React, or Vue.js. Ensure you have a basic project structure in place before proceeding to the next step.
In your JavaScript project file, import the GPT Engineer package using the appropriate import statement:
const gptEngineer = require("gpt-engineer");This allows you to access the functionality provided by GPT Engineer within your project.
Step 3: Write a Text Prompt and Generate Code
Define a text prompt that describes the code you want to generate. For example, you can use the following prompt to generate a JavaScript function that prints "Hello, world!" to the console:
const prompt = "Write a function that prints 'Hello, world!' to the console.";To generate the code based on the prompt, call the generateCode function on the GPT Engineer object:
const code = gptEngineer.generateCode(prompt);The generateCode function will return a string containing the generated JavaScript code.
Now you can now utilize the generated code within your project. For example, you can log the generated code to the console:
console.log(code);This will output the generated JavaScript code that prints "Hello, world!" when executed.
Build a Web Scrapper with GPT Engineer
For instance, if you want to build a web scraping application, you can provide prompts describing the websites to scrape, the data to extract, and how to store the extracted data. GPT Engineer will then generate the complete codebase for the application, including the necessary functions for web scraping, data extraction, and data storage.
Sample prompts for GPT-Engineer:
"Build a web scraping application that extracts the latest news articles from a news website. Store the extracted data in a CSV file."
Generated code by GPT Engineer:
import requests
from bs4 import BeautifulSoup
import csv

def scrape_news(url):
    response = requests.get(url)
    soup = BeautifulSoup(response.text, 'html.parser')
    news_articles = soup.find_all('div', class_='news-article')
    data = []
    for article in news_articles:
        title = article.find('h2').text
        link = article.find('a')['href']
        data.append([title, link])
    return data

def save_to_csv(data, filename):
    with open(filename, 'w', newline='') as file:
        writer = csv.writer(file)
        writer.writerows(data)

news_data = scrape_news('https://newswebsite.com')
save_to_csv(news_data, 'news_data.csv')
This feature of GPT Engineer opens up a world of possibilities for both seasoned developers and beginners. For beginners, it provides an easy way to get started with coding projects. For seasoned developers, it offers a quick and efficient way to prototype applications and test out ideas.
Integrate GPT Engineer within Your Existing Workflow
GPT Engineer is not just a tool for generating code; it's a platform that you can adapt and extend to fit your needs. Whether you want to customize the code generation process or integrate GPT Engineer with other tools, the open-source nature of GPT Engineer makes it possible.
Integrating GPT Engineer with your existing development workflow can enhance your coding productivity. Here are some tips to make the most out of GPT Engineer:
-
Use GPT Engineer for Boilerplate Code: When starting a new project, utilize GPT Engineer to generate boilerplate code for common tasks. For example, you can generate the basic structure of a web application or API endpoints using GPT Engineer.
-
Customize the Generated Code: GPT Engineer allows you to guide the code generation process based on your preferences. Experiment with different prompts and tweak the generated code to align with your preferred coding style and project requirements.
-
Combine GPT Engineer with Version Control: Integrate GPT Engineer with version control systems like Git to track the changes made to the generated code. This ensures transparency and enables collaboration with other developers working on the project.
By incorporating GPT Engineer into your development workflow, you can streamline your coding process and save valuable time.
Sample prompt for GPT Engineer:
"Generate a Django model for a blog post with fields for title, content, author, and publication date."
Generated code by GPT Engineer;
from django.db import models

class BlogPost(models.Model):
    title = models.CharField(max_length=200)
    content = models.TextField()
    author = models.CharField(max_length=100)
    publication_date = models.DateTimeField(auto_now_add=True)
This example showcases how GPT Engineer can be used to generate a Django model for a blog post. The generated code includes all the necessary fields for a blog post, including the title, content, author, and publication date. This not only saves time but also ensures that the code is structured and formatted correctly.
Compare GPT Engineer with Auto GPT
While GPT Engineer is a powerful tool, it's important to be aware of other similar platforms and tools available in the market. For Example:
- Autogpt, which also uses generative AI for code generation.
- Private GPT, which is an AI Agent that gives you privacy for using GPT models.
- Babyagi, as its name, it is an attempt for "baby step" for Autonomous AI Agents.
Comparing GPT Engineer and AutoGPT, there are key differences between GPT Engineer and Autogpt that might make one more suitable for your needs than the other. For instance, while both tools use text prompts for code generation, GPT Engineer offers more flexibility and control over the generated code. This makes GPT Engineer a more adaptable tool, especially for complex coding projects.
| Feature | GPT Engineer | AutoGPT |
|---|---|---|
| Code Generation | ✔️ | ✔️ |
| Text Prompts | ✔️ | ✔️ |
| Flexibility | ✔️ | ❌ |
| Control | ✔️ | ❌ |
| Adaptable | ✔️ | ❌ |
| Complex Projects | ✔️ | ❌ |
We can safely conclude that GPT Engineer is a leap forward comparing the previous generation of Autonomous Agents such as AutoGPT, which brings us one step closer to the fully autonomous coding AGI that might finally replace programmers.
GPT Engineer: Open Source Community and Tutorials
The community around GPT Engineer is growing, with many developers sharing their experiences and code examples on platforms like Reddit. These discussions provide valuable insights into the practical applications of GPT Engineer and can be a great resource for both beginners and experienced developers.
You can check out the GPT Engineer GitHub Community here (opens in a new tab).
There are also numerous tutorials and resources available online to help you get started with GPT Engineer. These include step-by-step guides on how to install GPT Engineer, tutorials on how to use GPT Engineer for various coding tasks, and even YouTube videos that provide a visual guide to using GPT Engineer.
Conclusion
In conclusion, GPT Engineer is a powerful tool for AI-based code generation. Whether you're a seasoned developer or a beginner, GPT Engineer offers a unique approach to building applications that are both efficient and adaptable. With its ability to generate code based on text prompts, GPT Engineer opens up a world of possibilities for various coding tasks.
FAQs
1. What is GPT Engineer?
GPT Engineer is an open-source AI tool that generates an entire codebase based on a prompt.
2. How does GPT Engineer work?
To use GPT Engineer, you specify what you want it to build, and the AI asks for clarification. It is designed to be easy to adapt and extend.
3. Can I download GPT Engineer?
Yes, you can download GPT Engineer for free from SourceForge.
4. What programming languages does GPT Engineer support?
GPT Engineer supports JavaScript and is available on GitHub for further customization and adaptation.
5. What can I build with GPT Engineer?
With GPT Engineer, you can build an entire app with a single prompt. It can generate code for various applications, including web scraping, building websites, and more.